Audio effects provide a world of color to your music productions. They fill in the gaps between raw samples and recorded tracks, transform melodies and chord progressions and accentuate details whilst providing depth and drama to each component of the mix.
Without audio effects, a track would need many, many instruments to gain any considerable depth and detail – think of how a full 100 piece symphonic orchestra comes together in classical music to create a dynamic acoustic composition.
With effects, your track can be elevated to new levels of creativity without the meticulous layering of individual sounds and effects.
Check this guide for the fundamentals of effects and the various ways the shape your track’s sound.
Two Worlds Apart? Analog and Digital Effects
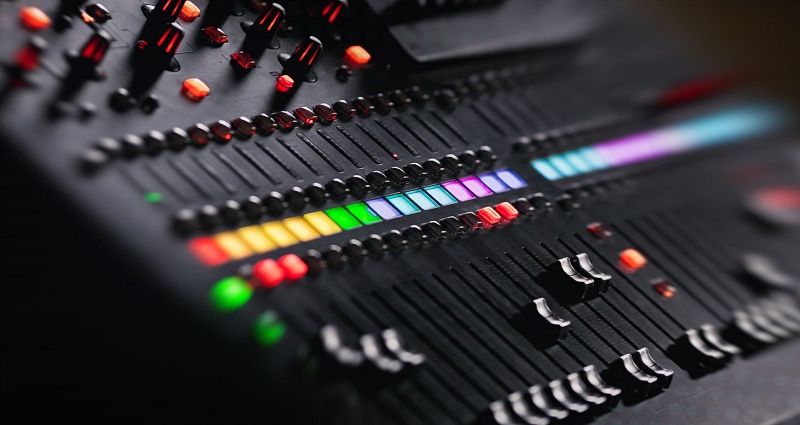
Audio effects exist in both the analog and digital domains. That means they are available as either digital software plugins or outboard physical units.
Often, audio effects plugins are based or built around analog units. On the market today, there are thousands upon thousands of audio effects units available for digital download and these combine parts of digital technology and analog modeling to form complex units that can do almost anything you can imagine!
Digital Plugins: The Way Forward?
Analog units are great but they’re expensive and inflexible. Analog compressors can set you back thousands. A digital plugin will rarely cost more than a few hundred dollars but most will cost much less enabling producers to equip their DAW with a multitude of effects and processing units.
You’ll find digital audio effects these in an array of formats like:
AU – Audio Unit – Used in Mac or OS software like Logic
AAX – For Pro Tools on both Mac and Windows
VST – A universal plugin type which only works in some DAWs (e.g. not Pro Tools)
The Varying Types of Audio Effects
When we talk about audio effects, we talk about virtually anything which effects or manipulates the signal in a creative manner. Commonly, people think of effects as reverb, delay, phaser and similar but actually, effects cover everything from EQ to compression and even panning.
The main categories of effects:
- Modulation – Chorus, flanger, phaser, etc
- Time-based – Delay, reverb, etc
- Dynamic – Compression, distortion,
- Filter – Envelope filters and LPFs, HPFs, etc
- Spectral – EQ, width, panning
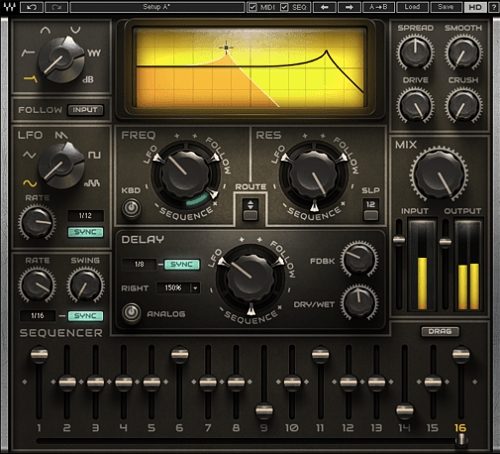
MetaFilter by Waves combines many audio effects into one unit.
Whilst this guide illustrates how individual effects work, many advanced effects units are composite in that they combine lots of plugins into one large unit. By understanding what each component does, you can accurately use composite effects to shape your audio in weird and wonderful ways.
Spectral and Field Audio Effects
Panning
Most modern audio is played back in stereo or surrounds sound – humans are equipped with two ears and this allows us to place sound directionally upon a 3D axis.
We can pinpoint the position of sounds in front of, to the side of and at the back of our heads.
In produced music, the main output is in stereo so the signals are distributed across stereo left and stereo right. This means audio appears to be wide and 3D with depth and detail distributed across the spectrum.
It’s worth noting that not all audio is played back in stereo. Original tape and vinyl music were recorded in mono for decades and some music is played back as mono on the radio or through sound systems. When we go about panning and widening music, we can’t forget about mono. In fact, audio panned down the center of the stereo field will often carry the most weight or impact.
Panning Mono Tracks
Mono sound sources generally include bass lines and some percussion or drums like snare hits. You want these to be directly in front of the listener to give them more impact and presence. You may hear ‘mono is louder’ – this isn’t technically true but mono tracks panned dead center may well appear louder in the mix.
Other mono sources can be panned left or right. For example, a mono synth could be placed just to the right of the bass line. A percussive cymbal hit could be panned hard left. There’s no wrong or right answer, so long as you keep at least your bass and snares down the middle.
Panning Stereo Tracks
You’re probably familiar that a stereo track is hard panned left and right on the channel fader by default. You can nudge the pan-pots inwards to narrow the stereo source. For example, a very wide synth could be nudged towards the center.
Generally, try and use panning to separate similar instruments into different spaces to create layers. For example, a thicker synth should be nudged towards the center and a thinner more high-pitched one should be nudged towards the outside.
Auto-Pan
Some plugins auto-pan your music so the signal is moved between the left and right of the stereo field automatically. These can create doppler-style effects or sounds which appear to move around your ears or even behind your head.
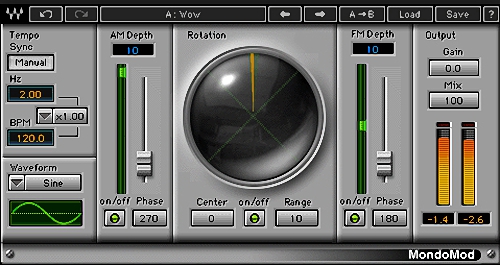
Above: MondoMod combines chorus modulation with an autopan to create automated stereo effects.
Width
Stereo width plugins use subtle processes to make a sound appear towards the outer edge of the stereo spectrum. By subtly delaying and filtering the left and right parts of a stereo sound, width effects spread a stereo source to even appear beyond the edges of the speakers.
TIP: Use stereo width and panning effects sparingly. A song which is spread too wide may sound impressive on some speakers but on other systems or headphones, it might sound thin or unfocused. Always keep your bass in the middle of the stereo spectrum for maximum impact.
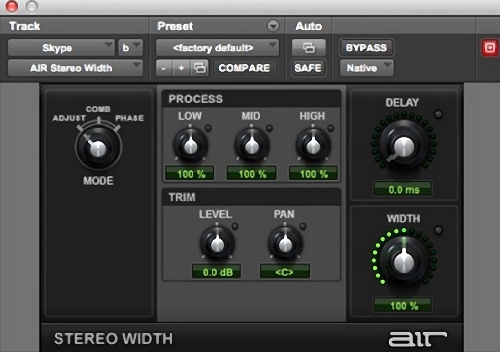
Above: Stereo width plugin by Air (Pro Tools)
Equalization (EQ)
Humans can access sounds between the boundaries of 20 Hz and 20,000 kHz. This is the frequency spectrum audible sounds operate in, at least to humans.
EQ allows us to shape this spectrum to change the balance of frequencies within this range. EQ isn’t often thought about as an ‘effect’ as such, but it’s the most important tool for creating a great sounding mix.
Equalization is an entire subject in its own right and it’ll take years to learn how to properly assess a track and apply the best EQ settings!
Even though EQ is tricky, never overlook it and always try your best to do it properly – you’ll improve with practice and when you start to get to grips with EQ, you’ll be able to vastly improve the quality of your music.
Digital EQs – Digital EQs are designed to affect the frequency spectrum with minimal distortion. They’re designed for surgical cuts to remove problematic frequencies as precisely as possible.
Analog EQs – Analog EQs saturate and distort the signal to add color and flavor to EQ’d sounds.
TIP: Cut rather than Boost – If there’s 1 golden rule to EQing it’s to focus on cutting rather than boosting. Cutting is actually called attenuation – cutting problem frequencies generally produce more favorable results than boosting which can introduce unwanted artifacts.
Time-Based Audio Effects
Delay and Echo
Delay is pretty self-explanatory but the range of effects it creates can span from subtle spacey twangs to massive swirling dramatic buildups.
Delay creates width, space, movement, and depth and it makes a solid foundation for further manipulation with reverbs, choruses on other modulation effects.
Delay works when a signal is repeated according to a set time delay. This might happen over and over if a high feedback setting is used, or just once or twice if a low feedback setting is worked. If you turn the feedback all the way up, you’ll notice that a delay rapidly stacks on top of itself until it creates a deafening layer of repeated signals.
Echo is very similar but it isn’t the same. An echoed sound will lose volume and frequency when it re-enters our ears, unlike a delay.
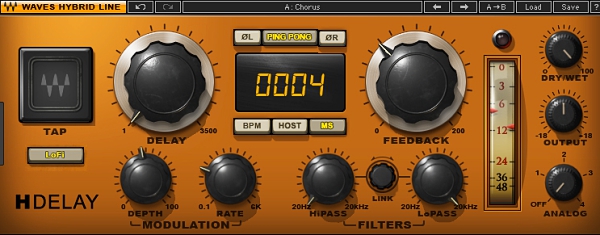
Above: H-Delay with high-pass and low-pass and modulation
Delay Settings
Delay time: This sets the duration between delayed signals and can often be set to the BPM of the tune in whole, half, quarter, 8th, 16th or 32nd notes.
High/Low filters: Many delays allow you to control whether the high or low part of a track is filtered. For example, you could set a low-pass filter to allow only the kick drums of a drum track to be delayed. This can create syncopated rhythmic effects.
Modulation: As the signal passes through the delay, it can be modulated with subtle volume changes to create flanging effects.
Reverb
Reverb is one of the most familiar effects. It’s a natural effect that we experience every single day. Reverb occurs when sound interacts with objects in a 3D space, rebounding off various walls and surfaces before re-entering our ears.
If we speak in a cave or staircase then we’re experiencing a really pronounced reverb effect. If we speak in a soundproofed studio, the most extreme being an anechoic chamber, then the sound will not reverberate whatsoever.
Before digital plugins, reverbs were created by playing back recorded sounds in a real echoey space through a set of speakers which were then re-recorded, or could be created using vibrating springs or metal plates. Now, plugins digitally recreate these parameters.
Reverb Controls
Predelay: the predelay alters the gap between your source sound and the point the reverb triggers. No pre-delay means your reverb triggers instantly when the source sound is played.
Early Reflection: In smaller rooms, early reflects are the quickest rebounding frequencies. In a small room, higher frequencies will rebind almost instantly whereas, in a bigger room, they will take some time to reflect or may not even reflect at all in the case of a cathedral.
Decay: Decay governs the time it takes for reverbs to dissolve or dissipate. Short decays create short reverbs whereas longer decays create a reverb which trails off over seconds or even minutes.
High and Low Dampening: Some spaces tend to flatten and dampen the higher frequencies whereas others absorb low frequencies and only reflect higher frequencies. These controls allow you to affect the brightness of your reverb.
Density: Controlled by reverb density, reverbs can be thick and dense or light and thin.
Diffusion: Diffusion effects how ambient your sound appears. Diffuse reverbs sound more whispery, fluid and controlled.
Wet/Dry: Like on many audio effects, wet/dry controls how much of your signal is effected by reverb.
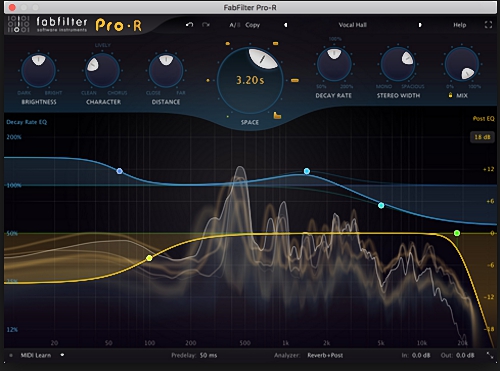
Above: FabFilter’s Pro-R which displays spectral data on reverberating frequencies.
TIP: Reverb creates massive contrasts between the front and back of your stereo space. A long and diffuse reverb can really drop a sound into the background for a more ambient effect whereas a short, sharp reverb can glue a sound towards the front of the mix.
Modulation Audio Effects
Chorus
A chorus of sounds occurs when multiple snippets of audio are played simultaneously to form a stacked ensemble of voices. Each snippet can be manipulated slightly to create a shimmery layered effect. Chorus units duplicate a sound into separate voices which are then effected and re-summed to create a stacked singular voice which is packed with more detail and presence than the original.
Chorus is traditionally applied to guitars and is used extensively in psychedelic and progressive rock, funk and many types of indie and modern rock too.
TIP: Chorus effects are frequently used to fatten up sources and make them appear wider without really widening the stereo image. Because chorus appears to layer lots of sounds together in one singular voice, it can add considerable depth to many sources.
Tremolo
Tremolo means “trembling” and that’s exactly what you can hear when applying tremolo effects. Tremolos are more of a guitar effect than anything else but they can be used on any sound to create movement. Tremolo actually modulates the amplitude of an audio signal to create a pulse or vibration which can be set to vibrate in time with your track’s bpm.
Flanger and Phaser
Flangers are phasers are pretty closely matched to tremolo in some senses. They use filters and LFOs, low-frequency oscillators, to modulate an audio signal with short delays.
Flanging creates short delays which elapse over a few milliseconds or so. They sound pretty similar to the chorus in many ways but without the extra weight or density.
Phasers instead use tiny delays and filters which make the sound seem to shift up and down in pitch.
Dynamic Audio Effects
Distortion
Most tracks use some form of distortion to create color and warmth. Distortion comes in many different forms from subtle overdrive to full-blown clipping distortion.
Distortion is mostly modeled on natural analog distortion created when a signal is pushed through transistors and other analog audio components. With subtle drive, distortion can warm up tracks and make them sound more authentic and thicker. Heavy distortion introduces lots of other artifacts to the signal ranging spanning from heavy warmth to screaming distortion.
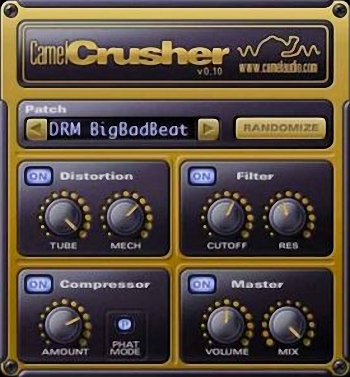
Above: The free CamelCrusher distortion unit.
Compression
Compression is an entire subject in its own right and like EQ, it’s not often thought to be a creative effect except in the case of sidechaining. Compression alters the dynamic range of a signal by altering its volume based on certain parameters.
Each signal has peaks and troughs and these may differ by a few dB. A very quiet brush stroke on a ride cymbal will be many times quieter than a loud snare rim shot, for example.
Compression brings these two extremes closer together, compressing the overall signal to keep the levels more stable.
Side Chain Compression
Sidechain compression enables you to link two or more signals so they interact together in unison. A common application is to sidechain a bassline to a kick drum. The compressor will kick in once the kick drum signal hits, ducking out the bassline so the kick penetrates through. This conserves mix headroom and prevents clashing between the bassline and kick.
Over-compression can really squeeze a track to pump in time with the music according to how you set your attack and release settings. Some compressors can be timed to release in time with your tracks BPM in quarter, 8th, 16th notes and so on.
Compression is often used to build volume by bringing the quietest elements of the mix up in relation to the loudest elements. This creates a less dynamic but more stable level of high volume.
Building Chains of Effects
Once we’ve understood the various effects available for mixing and production, we can start to think about combining them into more exciting stacks or composites. There’s no real right or wrong way to go about this but you do have to watch your CPU and consider consolidating tracks as you go you reduce processor load.
EQ and Compression in Chains of Effects
EQ and compression affect your sound fundamentally and their positions in the effects chain can manipulate your overall tones. Try dropping a compressor or EQ into different positions in the chain to see how it affects the overall sound in different ways.
- EQ can be placed at the start of an effects chain to cut frequencies before anything is effected.
- EQ can be placed at the end of an effects chain to affect the overall sound.
- EQ and filters are often built into effects – be careful not to stack different EQs because this can create filtering or phase issues.
- Compression can be applied at the start of the chain so subsequent effects work on the quieter parts more equally in relation to the louder parts.
- Compression applied at the end of a chain compresses the entire sum of effects – this is ideal for sidechain compression which should ideally work on the whole signal chain.
Summary
The varying use of effects is pretty endless – the basics here can be elaborated almost endlessly with other crazy composite units and stacking of different plugins.
With effects, you can easily transform recorded and sampled sounds into something which doesn’t resemble the original source in the slightest! It’s a weird and wonderful world which has opened music’s doors to many new types of musical creation!
Good luck!


