How to Build a Home Recording Studio
Equipment Essential List - from Beginner to Professional
Building a home studio isn’t nearly as hard as you think it is. But we made the mistake of jumping in head first without knowing what to buy. Before we knew it, we had spent thousands of dollars and weren’t any closer to recording the next underground hit album. That’s why we created this ultimate guide to building a home studio. Learn from our experiences so you don’t repeat the same mistakes (and trips to return equipment you don’t need).
So you want to be the next Deadmau5?
Or maybe you want to take the name Swedish House Mafia literally and actually start recording in your own home.
Hey, even the Rolling Stones recorded a multi-platinum hit in a house rather than a studio.
Their budget might have been a tad higher than yours, but don’t worry. You can build an awesome recording studio right in your bedroom, and it’s a lot easier than you think.
Of course, the equipment you need and the extent of your setup really depend on what your goals are. Do you want to record some songs for fun? Are you trying to become a pro? Either way, we’ve got you covered. We’ve broken down each section into categories:
- Beginner: You’re trying to mix a few songs to share with your friends on Facebook or you’re on a tight budget.
- Intermediate: You want to record an LP so you can brag to strangers.
- Pro: You want to create high-quality tracks and maybe make a living at this.
- Advanced: You want the next Abbey Road to be produced in your kitchen.
No matter your budget or goals, there is a way. Just follow our advice and you’ll be up and running in no time.
Home recording studio equipment essential list
A musician is an artist. His studio, his canvas. But just as there are essential colors that make up a palette, so too are there studio essential that you must have. As you get more comfortable with recording, you can add more accessories or embellishments, but you absolutely must have these tools at the bare minimum:
- A laptop
- A DAW and audio interface (we recommend a combo for beginners)
- A mic
- Headphones
- Studio monitors
- Midi keyboard/controller
- Accessories (cables and stands)
- A studio desk
If you have any of these items, feel free to skip the corresponding section; however, we highly recommend following our advice and reading EVERY section so your final setup fits seamlessly. If you don’t, you will either end up wasting money or being unsatisfied with your final production.
Pro Tip: Start simple
Myth: In-home recording studios are complicated and expensive.
We get countless inquiries from musicians from all walks of life that go something like this…
“I want to record music at home, but I don’t know where to start. Aren’t they hard to set up and really expensive?”.
The truth is that your home studio will be as complex and expensive as you make it. Some musicians crank out track after track with just a mic and guitar! (we don’t recommend this).
Start as simply as possible.
You don’t want to go too cheap, but basic equipment is a great place to start. Attempting too much right away will either discourage you or discourage you AND cost you thousands of dollars. A budget of around $500-$600 to start is not out of the question, though even increasing this a tad will result in exponential returns, in our opinion.
OK, enough freestyle jamming with no key. Let’s get into the structured part of this song:
1) Laptop for Music Production
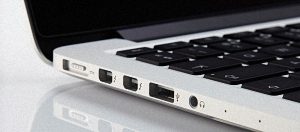 Behold, the crux of your entire studio—your laptop. Good news is that in 2018, you probably already have one. And, almost all laptops are fast enough to handle your recordings.
We do not recommend building your own laptop. Instead, use the one you already have unless you can afford to upgrade. In general, we found the laptop to be our biggest and most important expenditure. Heed this advice:
“Since the laptop is the most important aspect of your studio, buy the fastest one you can afford”
If you can afford a Mac, get one. They are the choice of most industry pros. If not, there are still plenty of options at all levels.
The most important laptop specs for a home studio
Do not buy a laptop for your studio without considering these specs in order of importance:
RAM: If your Laptop is the sun at the center of your home studio solar system, your Random Access Memory is the sun’s core. Get as much of it as you can afford. Don’t worry about why you need it. Just know that system performance will be severely degraded if you don’t have it. The more tracks and instruments you intend to have, the more RAM you need. Through our tinkering, we’ve come up with this rough guide:
- 2GB: This is the bare minimum in our opinion. You can only create very lightweight and simple tracks.
- 4GB: This is the recommended minimum if you want to produce some serious tracks.
- 8GB: You’re basically the London Philharmonic Orchestra now.
Processor: If you want to run your home studio without any lag (you don’t want to be interrupted when you’re in the zone), your processor has got to be top notch. Quad core is far better than dual core, but if you are choosing within the same category, consider these recommendations:
- i5: This is the recommended minimum. Any laptop with an i5 processor should work (TIP: turn off all processes not related to recording or even go offline). As a beginner, you’ll do just fine. If you want to get more serious, you should upgrade to i7.
- i7: In our opinion, it’s worth the money to go for the i7 processor for more serious projects.
SSD: SSDs result in noticeably better performance but are not absolutely necessary. We recommend focusing on RAM or the processor if you’re on a budget. As a beginner, don’t go too crazy with this. You can always upgrade later. Focus on an external HDD to save projects.
Our Top Picks for Music Production Laptop:
With these specs in mind, our recommendations for the best laptops for music production are:
- Ultra Budget: Your laptop
- Beginner – Acer Aspire E 15 (cheap and reliable)
- Intermediate – Dell Inspiron 15.6” (great connectivity options)
- Pro – Asus ZenBook Pro (amazing display)
- Super Pro – Apple MacBook Pro 15” (the choice of professional producers)
Need more guidance? Check out our ultimate music laptop buying guide to get the perfect laptop for your home studio.
Extra Tips for Buying a Music Production Laptop
Aside from the specs above, you’ll definitely want to pay attention to:
- Operating System: Windows works fine but can be a buggy and unstable. Pros are obviously the way lower price and the fact that you can customize pretty much anything. OSX is the standard in the music industry these days, though. It’s way more stable, less glitchy, and less buggy.
- Display: You can always get another monitor, as more eye space never hurts.
- Keyboard: This is just a personal preference of ours. A comfortable and easy-to-navigate keyboard is a nice luxury.
- Battery Life: Imagine the horror of having to plug your laptop in every few hours. If you’re in the zone, you want to stay in the zone.
OK, now that you’ve got the most important part out of the way, it’s time to move on to the thing that will actually record, edit, mix, and do pretty much everything else music wise (after this next step, you’ll have the two most important things out of the way).
2) A Digital Audio Workstation (DAW)
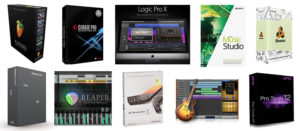 Your choice of a DAW is extremely important, mostly because it’s responsible for just about everything. All recording, editing, mixing, and mastering is done through this little machine. The good news is that pretty much all of the models out there can get the job done.
At the very low end, there are free DAWs—we all have that friend who got started on GarageBand (literally in a garage, too)—and at the high end, there are workstations that rival major studios. But which one is right for you?
The question to ask yourself is:
What am I trying to produce?
If you are into simple music and don’t anticipate layering dozens of instruments on top of each other, something simple is fine. It’s how you use the DAW that counts.
Pro Tip: Avoid free DAWs. The majority of home musicians tinker for a few weeks before deciding they hate them. This is time wasted. Instead, try a “limited” version of a paid DAW and get a feel for it. You’ll quickly see if it’s got what you need.
While the gap between the low-end and high-end models has narrowed significantly, there still are some major advantages to each. If you want to do your own research, there are few things to consider.
The most important factors in choosing a DAW
In our experience, home musicians need to pay attention to:
- Instrument choice
- MIDI
- Pitch shifting
- The interface itself
- Effects
- Audio tracks
- Upgrades (one model in our list has FREE LIFETIME upgrades!)
Our Top Picks for Music Production Software:
Do some research and see what each one offers and which one suits you best. Or, you can just take our word for it!
- Beginner – Fruity Loops (FL Studios) (FREE LIFETIME UPGRADES & extremely easy to work with)
- Intermediate – Propellerhead Reason (feature rich and stable)
- Pro – Steinberg Cubase (huge sound library)
- Super Pro – Ableton Live (perfect for live performances)
DAWs are complex devices, and you DO NOT want to get this one wrong. Be sure to read up on our guide to DAWs before making a major purchase.
If you’re just starting out, we recommend buying a DAW/audio interface combo. Why? It’s cheaper and it’s one less item on the list you’ve got to worry about. Also, it shortens your learning curve.
3) Studio Headphones
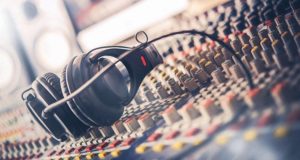 Picture the last time you watched a hip hop video featuring artists in the booth—when was the last time you saw an artist using earbuds?
Can’t remember? It’s because you haven’t. Instead of plugging one ear with their pointer finger, they’re grasping the side of a pair of pro studio-quality headphones. Hearing each nuanced sound emerge in unison allows you to get closer to your creation, creating a more detailed image of the project you are working on.
There are generally two types of studio headphones:
- Open-back: This model provides a more natural sound and is usually lightweight. The downside is they let in a good deal of outside noise.
- Closed-back: In case you weren’t aware, music studios get loud. Closed-back headphones are great for tracking because they isolate the sound from the outside world. You can also tune the cup for a particular response. For example, to boost a specific range of frequencies.
Pro Tip: As a beginner, don’t worry too much about your choice of headphones. Most of the musicians we know started their home studio with a basic set of pro headphones. You don’t need Beats by Dre to make some killer music. Start small and see what you like and need. You can build from there until you find the perfect pair.
What to Look for in Studio Headphones
Whether you are just buying your first pair or are already a Skrillex-level audio master, there are few things that matter when buying studio headphones:
- Comfort: Honestly, most people think audio quality is priority #1. They aren’t wrong, but in our opinion, it’s second behind comfort. You’re going to be wearing them for a long time, and the last thing you need is to be frustrated or uncomfortable while working your magic.
- Durability: You’re going to be twisting, turning, and bending your pair quite a bit, so focus on durability. Aluminum is a durable metal that lasts a long time. Of course, more durability usually means a higher price. By the way, this also goes for the cable!
- Flat Response: You need flat response headphones. They relay the audio to you the same as it was recorded.
- Extra Conveniences: If you have some money to burn, look for some cool extra conveniences. We’ve found that volume controls on the cable, cool designs, and extra portability were the best “hidden factors” to focus on.
Our Top Picks for Studio Headphones:
Depending on your level and budget, the best models we’ve found are:
- Beginner – Sony MDR7506 (Cheap, sturdy, and great value)
- Intermediate – AKG K 240 MK II (long-lasting design, excellent balance)
- Pro – Sennheiser HD 600 (the best open-back recording headphones)
- Super Pro – Shure SRH1540 (the ultimate mixing headphones—club DJ level)
Still not sure? Check out our studio headphones buying guide.
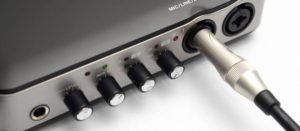
4) Audio Interface
 If you’re just starting out on your journey, a DAW/audio interface combo is the way to go. If not, then you’ve got to put some serious thought into your audio interface. There’s a simple reason for this:
Your audio interface determines how many pieces of equipment you can connect to your computer.
There’s just one small issue—it’s really complicated.
Each audio interface is specifically designed for a certain type of studio. That means if you want to start a studio in your bedroom (like you, if you’re reading this), then you can get away with some seriously cheap models.
If all you need to do is connect your guitar and some studio monitors, you can get away with spending around $100. But, if you want souped-up studio magic with dozens of INs/OUTs, you might need god knows how many and spend who knows how much. Not to mention that you’ve got to consider DAW compatibility, input/output count, channel types, and….see why we recommend getting the combo as a beginner?
Still, a great audio interface will help take your game to the next level. Here are a few factors to consider:
- Interface Connectors: There are 4 common cable options:
- USB: Typical for cheaper models and the slowest of the 4. However, they are almost all fast enough to get the job done for most music production.
- Firewire: Becoming less common but offer a lot more speed.
- Thunderbolt: Great for semi-pro musicians doing more complex music. Faster than USB and firewire.
- PCIe: The best there is. The best there was. The best there ever will be. This stuff is for the pros.
- DAW Compatibility: Most DAWs are compatible with most audio interfaces. Just make sure yours is. Some are loyal only to certain models.
- Input/Output Count: Solo musicians may only need about 4 inputs. Engineers will need as many as you can fit. In general, 4 should be enough for a home studio.
- Form Factor: This is an overly fancy term for music snobs. Basically, it’s just how the thing looks. The two main forms are desktop and rack mounted. The former sits on your desk, the latter goes on a rack. Simple.
Our Top Picks for Audio Interfaces:
Generally, you can get away with a simpler audio interface unless you are trying to get on the Billboard Hot 100. If you want to record serious tracks, splurge a bit on your interface.
- Beginner – Focusrite Scarlett 2i2 (simple, efficient, basically the best overall)
- Intermediate – Avid Mbox 4×4 (recommended for Mac users)
- Pro – Native Instruments Komplete Audio 6 (great quality, compact, great software bundle)
- Super Pro – Focusrite Saffire Pro 40 (for professional studio producers)
Don’t underestimate the importance of your audio interface. Read our in-depth guide and comparison table to make sure you get it right.
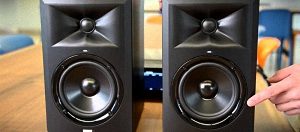
5) Studio Monitor Speakers
 Just because you’re going to spend hours upon hours buried in your headphones doesn’t mean you don’t need studio monitor speakers.
A home studio is not complete with a set of nearfield speakers to give you the cold, hard truth about your project.
Unlike commercial monitors, studio monitors give you an uncolored representation of your music. This neutral feedback helps you come up with an objective opinion on your mix (and is the cause of a lot of deep musician self-loathing!). Accuracy is king in the studio speaker realm, but there are a few things every home musician must know first.
Pros and Cons of Monitors
In our opinion, you absolutely need them. Still, there are a few things to be aware of:
Pros
- You save your ears from the abuse of wearing headphones all day
- You get a clearer picture of your music project
- You can easily show progress to a 3rd party
- They provide the best way to make decisions about your music
Cons
- Can be expensive
- Are a bit complicated due to physics (we’ll explain)
Studio Monitor Buying Factors
- Nearfield Monitors: These speakers are placed close to the listening position. Since you’ll be at home, chances are you’ll want a pair of these. TIP: Hip hop and electronic music normally go well with bigger speakers.
- Your Room: You can’t cheat physics. This is one of the biggest mistakes home studio builders make. A smaller room usually means you should have smaller speakers. TIP: If you’re positioning your speakers against the wall, get front-ported monitors to prevent bass buildup in the back.
- Subwoofer: If you’re a bass-master, you’ll probably want a subwoofer. You can get some heavy low-end with one. This will jack up the price quite a bit, though.
How to Position Your Studio Monitor Speakers
You want to get a killer sound, right? Great. But you also want to get the most accurate reproduction of music. We’ve found that the best way to get the most from your speakers is to position the pair so that you and the two speakers complete a triangle. This will give you the same volume and level of clarity from each speaker.
There are tons of models to choose from, and this is not a light investment, so you should really heed our advice here.
Our Top Picks for Studio Monitor Speakers:
- Beginner – Mackie CR4 (simple and high-quality. Great for beginners)
- Intermediate – KRK Rokit 5 G3 (Also entry-level. Easy controls)
- Pro – Yamaha HS8 (outstanding and durable)
- Super Pro – Adam Audio A7X (can’t get higher quality than this)
For more information on the best studio monitors, see our full review here.
OK, now that we’ve got the heavy equipment out of the way, your studio is really starting to take form.
Now, let’s move on to where the magic happens….
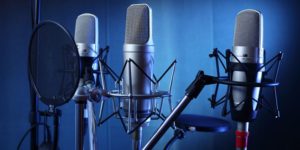
6) Recording Microphones
 Up next, you’re going to need at least one mic. If you plan on layering multiple tracks using various instruments, you’re going to need even more. So let us clue you in on one of saddest truths of the music industry:
It doesn’t matter if you’re Michael Jackson, Michael Bolton, or Michael Jordan, if you don’t have a good mic, you are going to sound terrible.
It’s just the nature of studio recording. You know how even the worst singers can be saved my good mics and studio magic (autotune!)? The opposite is also true—the best singers can be sabotaged by a terrible mic.
So, understand this principle of home studio building: there is no point in buying a good DAW, interface, or laptop if you’re going to skimp on a mic. There are plenty of studio-quality mics that can be had on a budget. Keep in mind that the perfect mic depends on which instruments you’re going to record.
The Two Types of mics
The two main types of mics are:
- Dynamic: Very sturdy and equipped with a solid frequency response. Great for performing live. This means you can spill your beer on them, throw them into the crowd, and drop them on stage a few times before you’re back at Guitar Center.
- Condenser Mics: These are the more sensitive type used in studios. They are categorized by their diaphragms. If you want lower frequency (for vocals), get a large diaphragm. If you want higher (acoustic guitar), get a small diaphragm.
Most Important Home Studio Mic Specs
There are a few things to look for in every studio mic. Some come down to preference and budget and others come down to what you will be recording.
Pay attention to:
- Ease of Use: Is it adaptable? Is it simple? How easy is it to plug in, and how long does the power source last? Some are tough to figure out, and that means getting max value from them is even harder.
- Versatility: Some mics are great for vocals and instruments. Some are great for everything. Some others can be used on stage, in the studio, and double as an extra piece of furniture in the home. We recommend getting a budget mic that wears many hats if you’re a beginner.
- Self-Noise: If it makes a lot of noise on its own, it might not be worth the investment.
- Durability: Nothing is worse than dropping a few hundred dollars on a mic and having it break. We mean nothing.
Our Top Picks for Studio Mics for a Home Studio
- Beginner – Shure SM58 (versatile, solid performance, great for starting out)
- Intermediate – Rode NT1-A (old-school, low self-noise, great value)
- Pro – Neumann TLM102 (professional level, exceptional quality)
- Super Pro – Manley Reference (the kind you see in R&B music videos)
Don’t see something you like? Check out our top 10 mics on the market here.
7) MIDI Keyboard/Controller
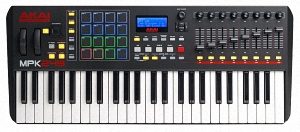 A keyboard controller is an instrument with piano-style keys and a selection of knobs, buttons, and sliders that transmit MIDI data to external sound modules or software….
In English, that basically means it’s a device that lets you control everything in your studio. A MIDI keyboard gives you total control over your virtual instruments from one convenient location. Not only can you lay some soul-tingling piano tracks, but you can also control settings, options, presets, and plugins in your DAW.
It makes your entire recording life way easier.
Before sinking what’s left of your studio budget into one, consider these factors:
What to Look for in a Home Studio MIDI Keyboard
- Key Count: How complex is your next magnum opus going to be? If you’re just starting, 25 keys oughta do. If you’re Prince, get 88.
- Aftertouch: Invest a bit more and you can get a keyboard with some killer emotional aftertouch tones.
- Buttons and Such: How many faders, knobs, and buttons does it have?
- Input/Output: USB, IO; 5-pin MIDI jacks, etc.
Honestly, this won’t make or break your studio like some of the other tools on this list, so we’ll keep this brief. Here are our choices:
- Beginner – Midiplus AKM320 (simple interface, easy to fit into your workspace)
- Intermediate – Behringer U- Control UMX610 (portable, great battery life)
- Pro – Alesis V49 (very user-friendly, great quality)
- Super Pro – Akai Professional MPK249 (great for beats, simple, hands down the best)
We know how confusing MIDI keyboards can be for first-timers. We’ve put this guide together to help you better understand which one is best for your home studio.
8) Cables, Stands, and Racks
Now that you’ve built a killer home studio, it’s time to get to a few accessories. These won’t make or break your recording, but they will provide that extra oomph you need to really make something special. If nothing else, they’ll make you look cooler while recording.
Let’s start with some of the basics:
Cables
Beginner producer: How important are studio cables?
Famous producer: Man, a cable is just a cable.
Beginner producer: Then why do yours cost 2x more than my entire studio?
Famous producer: **Knocks over water and runs out**
….this might be a bit over the top, but you get the point. The average studio guru will tell you cables don’t matter, but then go and drop thousands of dollars on them and can’t explain why. The same concept that applies to all goods applies to studio cables: the more you spend the better the quality and the longer they last.
If you’re a beginner, then just know this one thing—as long as you don’t buy the cheapest $5 option, you should be fine.
The intersection of value and performance is somewhere in the $30-$50 range. Anything more and you need to be a serious musician to get the extra value.
Tip: Always have more than you need. Keep a few extra lying around and make sure they are rolled up!
Mic Stands
Your mic stand is like the unsung hero in a classic movie—it never gets the credit until it’s needed the most.
Anyone who has ever bought an expensive mic only to have it crash to the ground knows how good a high-quality mic stand is.
Here are some quick guidelines:
- Desktop Stands: Great for basic home studio recording. They go, you guessed it, on your desk!
- Tripod: Good for all-purpose use. A bit more expensive.
- Low-Profile Stands: Ideal for kick drums and guitar cabs.
The problem with stands is you really can’t test them out right away and get a feel for them. You need to use them for a prolonged period to know how they hold up. The best advice we can give is to read product reviews and go with a trusted company. As a rule of thumb, spend a tad above your price range to ensure you get quality.
Racks
As a beginner, you need not worry about home studio racks. But as your studio matures into a master’s den of music making, you’ll graduate to larger and more advanced equipment. Your rack is where you’ll put your audio interface, amp management system, and power conditioner among other things.
Honestly, even advanced home studios will only need a basic home studio rack. They are great for keeping expensive and fragile equipment organized.
OK, so you now have everything you need to make the next classic album right in your bedroom. Now, all you need is a place to put everything.
ENTER: the studio desk.
9) Studio Desk
Aside from being made out of wood and not good at computing much of anything, your studio desk choice follows the same principles as your laptop (for a home studio we mean):
Chances are, you already have a studio desk, and the one you have now will work just fine when you’re starting out.
So like we said about your computer—if you’re on a budget, try to use the one you have now.
But, if you’ve got some money to burn, a nice studio desk for your home recording studio goes a long way.
First, tally up the number of devices you have (if you don’t have racks), and see how much space you need. Next, consider these factors:
- Cables: You’ll need some form of cable management system unless you want to start drilling holes.
- Standing or Sitting?: A standing desk is great for your back and much easier to use with a guitar slung over your shoulder. A normal sitting desk is fine for mixing and electronic music.
- Durability: With the weight of your home studio sitting on its shoulders, the last thing you want is for everything to tumble. Avoid pressboard.
And last but not least….
10) Music Production Books
Sure, you can learn pretty much anything on YouTube. And yes, you can google helpful articles for all the best tips (like this one!), but nothing compares to the feeling of an old-school production book.
Some of them are truly masterful pieces of work that are full of advanced knowledge that will help you progress very quickly. Plus, it really helps to have everything laid out for you.
When choosing a music production book, focus on:
- Books for certain instruments
- Books for solo musicians recording at home
- Books for mixing
- Books on the music business (if you want to make some money)
You can even get a general music theory book if you want. Music production books are especially useful for engineers working at home.
Want to build a home studio on a budget? It isn’t nearly as hard as you think. With these 10 essentials, you’ll be the next underground superstar in no time.
Remember: Each piece of equipment is a key cog in the machine, and getting a sub-par device can pull the rug out from underneath your entire set up. Follow our advice

 (80 votes, average: 4.31 out of 5)
MacBook pro as the best laptop for recording? It doesn’t even have an optical port.
No mention of ribbon mics. If you record brass or strings or sax, you’re better off with a 200$ ribbon than any entry or mid level condenser.
Ableton is not a super pro level daw. They have done a very nice job of offering a variety of packages, the simplest being the Lite version all the way up to pro level. Lite can be found for free and is adequate for many musicians.