So, you’ve finally got everything you need to build your very own recording studio? Congrats!
Just one thing left then, setting it all up!
Set up isn’t about rushing to set everything up before switching it on and hoping for the best.
That might be tempting but taking your time on setting everything up properly will save you hours, or even days, in the long run.
We’ve all been there – assembling gear without actually following instructions and guidelines can go OK but most of the time, it wastes time in the long run, even if we don’t like to admit it!
Save yourself the frustration and read this comprehensive guide to assembling your studio.
The Room: Where the Magic Happens
The room is key to any recording studio. You may only have 1 option, e.g. your bedroom, which is fine, but sometimes there you may have a few rooms to pick from.
4 Steps to Picking The Best Room
- Generally, bigger rooms are better. So we’re assuming that you don’t have a sports hall in your house! Bigger rooms have more space for you, instruments, equipment and musicians. They’ll also generally sound better and offer greater room for expansion.
- Windows are bad. Windows really don’t react well to noise. They’re very bouncy and sound will reflect right off them. Also, the sound will leak out of the windows to annoy the neighbors, etc.
- Noise. Room noise doesn’t just emanate from outside sources like cars, wind, people, etc. It also comes from radiators, electric heaters, boilers, lamps, and other similar electrical items. The quieter the room the better. Also, some of these electrical devices might cause interference or noise if placed next to speakers or microphones.
- Flooring. Both the floor and ceiling make a difference to your room’s acoustics but flooring arguably matters more because your desk, instruments, amps, and speaker stands are connected to it. A softer carpeted floor is always advisable. If you don’t have one then lay something down – a mat, carpet, cardboard, anything but a hard floor!
The Room: Choose the Right Wall
Positioning your set up around the right wall will bring you a long way forward in optimizing your room’s acoustics.
- Never sit in the middle of your room. This area is called the dreaded ‘null zone’. In the middle of the room, colliding sounds combine and cancel out through comb filtering, heavily reducing the accuracy of your monitors.
- Never place your head across the middle of the room. If you have less space behind you than in front of you then that’ll distort your room’s acoustics.

By adhering to these rules, you’re left with two options:
In long or narrow rooms, use the shortest wall. This increases the distance sounds need to travel from your monitors to the back wall, decreasing the chance of reflection.
In rectangular rooms, use the longest wall. In some short rectangular rooms, you’d either be positioning your head across the halfway line or in the middle by setting up along the shortest wall. Use the longest wall to avoid breaking these rules.
Poor room setup damages your sound:
- Bass frequencies can disappear in a poorly set up recording studio. This makes it incredibly hard to mix bass and you’ll end up turning it up to overcompensate.
- Sounds may appear overly wide or overly narrow. You may end up widening every sound in your mix to realize you’ve ruined its mono compatibility.
- You might alter the volume of certain tracks which appear either too loud or too quiet in your room’s acoustics.
Overall, a poorly chosen acoustic space will destroy your ability to create an accurate mix. You’ll end up slaving away over many aspects of your mix when you could have simply planned and set up your room properly in the first place!
The solution…treatment.
The Room: Room Treatment
We’ve produced a comprehensive post on acoustic treatment here but lets recap:
The goals of acoustically treating a room are twofold:
- Eliminate Standing Reflections: These are the kind of echoes we hear in echoey spaces. Wander around your empty room and clap your hands – the chances are you’ll hear some sound feedback into your ears. We want to eliminate these standing reflections
- Reduce Resonance: Some frequencies are equal to or divisible by to the size of your room, e.g. a wavelength (the literal length of a sound wave) may be so close to the length of your room that it bounces back and forth like a spring. It gets ‘caught’ and resonates, causing all sorts of acoustic distortion in its wake.
By treating a room, you’re turning it into a cleaner, deader space, just like a professional studio which uses high-end foam and other treatment material. That stuff is expensive, though, so consider these DIY tips:
If you can only choose a couple of areas to treat in a room then treat the corners, the area behind your speakers and the wall directly behind you.
Corners: The corners of a room trap bass. This is because we need our monitor speakers pointing diagonally towards our ears, forcing sound to bounce diagonally off walls until it reaches the corners of the room.
If you play bassy music in an empty room and position your head in the corner then you’ll most likely notice vastly exaggerated bass. If you can’t afford foam bass traps then stack boxes along the corners of your room and fill them with semi-hard materials like books.
Back wall: The back wall is the first point of contact for sound coming from your monitor speakers. Thick acoustic treatment here can vastly reduce early reflections.
Area behind the speakers: Bass frequencies move omnidirectionally, so in all directions away from a speaker. Yep, the bass actually comes out of the back of your speakers, despite the fact they face towards you. Soundproofing the rear of your speakers prevents nasty build ups of bass.
Finally, we’re getting to assembling the good bits: the actual gear!
Setting up Your Equipment
So you’ve chosen and cleared out a well-sized room without windows, hard floors and interfering sounds. You’ve then treated your room. It’s time to set up!
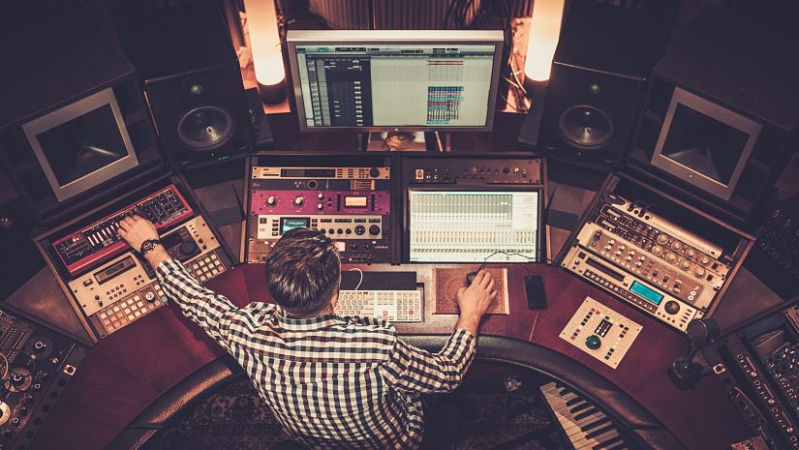
It makes sense to begin with your desk. After all, studio work is essentially a desk job – a fun type of desk job!
Any desk job requires a good chair, preferably one on coasters that can be easily maneuvered. Reclining is a bonus for when you want to kick back and listen to your work.
Set your desk up and place your PC monitor first. It ought to be at a comfortable distance, neither too close nor too far. If you’re using a mixing desk, which is unlikely in a small room, then try and get your monitor as close as possible.
Now, it’s time to place your monitor speakers. For advanced tips on placing your monitor speakers, please refer to our article Studio Monitor Placement: 5 Positioning Tips for Optimal Sound.
Monitor Placement Basics
Essentially though, the basics are to place monitors to form a triangle with your ears. Your monitors need to be angled in towards your ears and the tweeters need to be at ear height. This is very important as high frequencies are very directional – they need to travel pretty much straight towards you or they’ll miss you. Imagine them your tweeters as laser pointers and point them at your ears.
Once your PC monitor and monitor speakers are correctly placed, you can arrange other gear like interfaces and MIDI controllers.
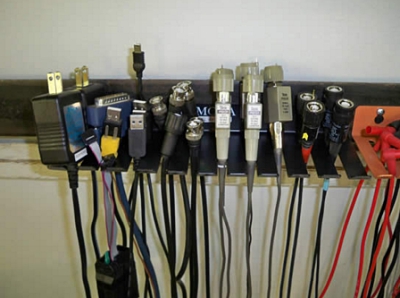
Cabling
Check this article for an extensive guide to cabling. Here are the basics:
USB cables: Needed to power interfaces and MIDI keyboards, devices, etc. You may need lots types of USB cable at some point – USB-C, micro, mini, stock up!
XLR Cables: The most common instrument cable, stock up on balanced XLRs for connecting microphones. Your monitor speakers may either take XLRs or TRS jack leads depending on your interface’s output.
TRS/TS Jack: If you’re unsure of the difference between these cables, check out our cabling guide. Basically, though, a TS or unbalanced jack is a regular guitar lead. A TRS jack is a balanced cable and you’ll likely use this for connecting your interface to your speakers.
Power cables/Kettle Leads: Used to power amps, your speakers, PC tower and other devices, this is another key lead that you’ll be using all the time – stock up!
Plugging Everything In
Just one step away from firing everything up now…
Studio gear connects via something known as the signal flow.
A signal has to travel from its origin (the instrument) to its final output (the speakers). In the process, it travels into a preamp, interface and into your DAW where you’ll manipulate it with plugins, automation, mixing, mastering, etc.
The final result of the signal flow? Music!
We’ve created a comprehensive guide to signal flow: Understanding Audio Signal Flow in Recording Studio.
Plugging everything in might be an easy task but it depends on how much gear you have! Here are a few tips to bear in mind when cabling your gear:
TIP: Buy some cables ties or cables tidies! Cables WILL get messy if you don’t do this and as soon as you give your cables free reign, they will get all tangled upkeep your cables on a leash!
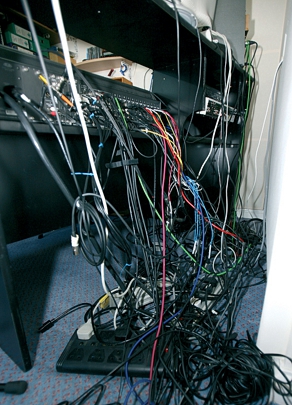
TIP: Always bear in mind the distances from power supplies to gear and interfaces to instruments. You’ll need the right cables in the right lengths. Longer cables are always better than those that are too short.
TIP: Be wary of using too many mains power extension cables. Try and run sensitive equipment like your PC off its own mains socket and use a surge protector to prevent damage.
Your Recording Space
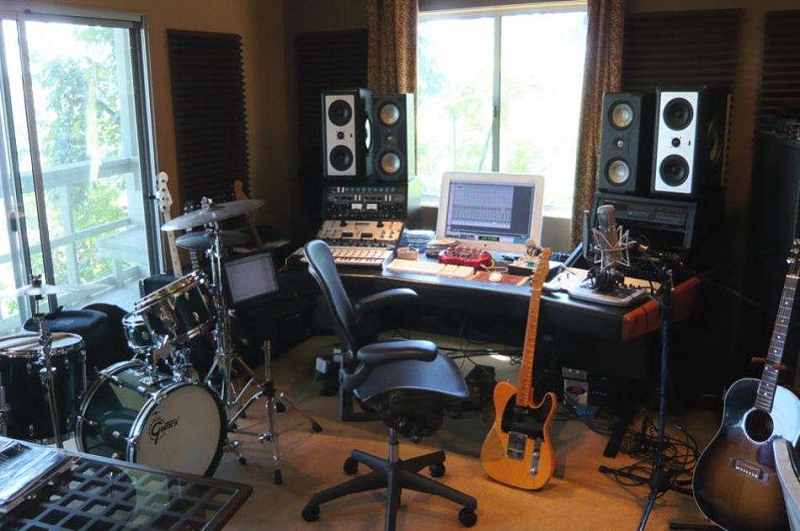
So you’re sorted as the studio engineer/producer, what about a space for musicians?
This comes down to your room size. Often, you’ll just have to squeeze instrument space in where you can.
Bear in mind that having amps blast straight toward you is offputting during the recording process! Still, if you’re packing drums into your space too then you’ll have little option but to wear your best noise-canceling headphones whilst monitoring!
TIP: If you have two monitors then it’s great to angle one towards musicians so they can view their levels during recording whilst you sit at the desk.
TIP: In a DIY home studio, padding out your recording space can reduce microphone bleed. Placing a soft sofa in the middle of your studio can help reduce reflections and bleed, as can duvets, sheets, pillows and almost anything else that looks like it’ll deaden the sound – get snug.
TIP: Headphone leads are short – grab some extenders to give your musicians greater freedom to roam.
Stock Up On Accessories!
Accessories, accessories, accessories! Aside from the obvious stuff like cables, etc, here’s a quick checklist of miscellaneous accessories:
- Tape, electrical and gaffer/duct tape
- Padding, e.g. pillow for bass drum
- Drum key/tool
- Picks/plectrums
- Drumsticks
- Moongel/other drum dampeners
- Stands
- Cable tidies
- Chairs
- Velcro straps
- DI box
- Batteries – lots of batteries!
Conclusion
That’s it! The ideal DIY home setup would probably be a large rectangle with extensive bass trapping, rear wall treatment, proper monitor placement with acoustic treatment and it would have tons of well-organized cables, a comfortable chair, a selection of extra seating and sheets and duvets. And tons of accessories…
When it comes to setting up a DIY home studio, it’s about thinking outside of the box to seek out the best sound and setup available to you.
DIY solutions to typical studio problems can greatly enhance your sound. It might sound a bit ridiculous to pad out your room with duvets when recording a band but it can honestly enhance your recordings, transforming them beyond that of a typical bedroom setup.
It’s not just about recording, though. For producers, setting up your room properly can help you accurately produce music and mix it to a finer, more professional level.
The worst thing you can do is throw everything together and start making music. It might be tempting – you might be excited to get started – but planning your recording studio will help you make better music, it’s as simple as that.
That’s worth it, right? Good luck!

